Vivado HLS を使ってみた(その2) [FPGA]
まずテストプログラムを作ってしまいます。ごく普通にC/C++で書いていきます。
(tab=4をスペースに置換してるので崩れてます)
I/Oポートのデータ幅を決めておきたいので、そこだけ特別な記述が入ります。
前の記事の通り、題材はRGB→YCbCr変換。実はVivado HLSには画像のためのパッケージも入っていて、RGBとかYCbCrなどの型がすでに宣言されていますが、今回は使わずに全部自分で書いてみます。
ヘッダ。「Source」を右クリックして「rgb2ycbcr.h」というファイル名で追加。
※これは後から気づいたことですが、dwはマクロじゃ無くてテンプレートで与えるべきでしょうね。
テストベンチ。「TestBench」を右クリックして「test01.cpp」というファイル名で追加。
BMPファイルを読み込んで、変換して、BMPに保存します。実行パスが「.\rgb2ycbcr\solution1\csim\build\csim.exe」という深いところにできるので画像へのパスが長めに…(笑)
RGB→YCbCr変換はWikiに書いてある方法そのままです。ついでに画像を元に戻すYCbCr→RGBの逆変換関数も用意します。けど、なにも工夫してません。ちゃんと精度のこと考えてないので、正確でもありません。エラーチェックもろくしていない全くもっていい加減なプログラム。まぁだいたい見た目が似てればよいや、的な作りです。
後でmainでコメントアウトしているrgb2ycbcrとref_rgb2ycbcrを入れ替えてテストします。
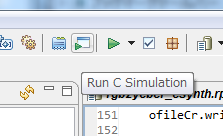
とりあえずこのまま実行してみます。「Run C Simulation」をポチ。

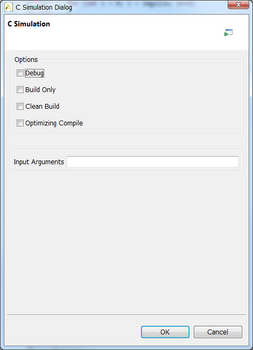
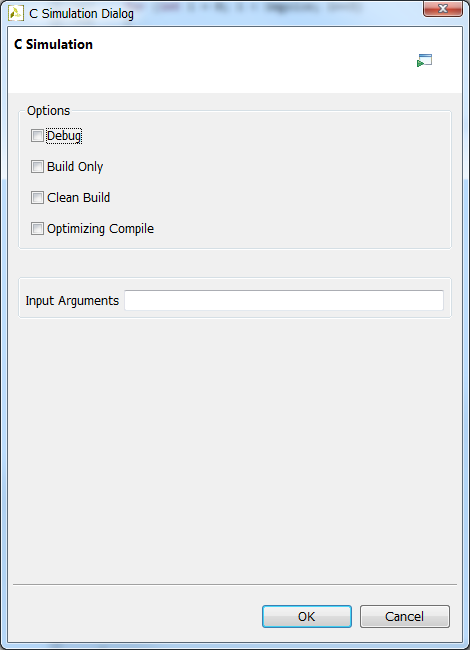
デフォルトのまま実行開始。
こんな画像が出てきます。(※So-netブログはBMPダメ)。
左から、元画像、Y、Cb、Cr、BGR=CbYCrに置き換え、逆変換した画像

実行環境ができたので、ハードウェアになる対象の関数を記述していきます。
(tab=4をスペースに置換してるので崩れてます)
I/Oポートのデータ幅を決めておきたいので、そこだけ特別な記述が入ります。
前の記事の通り、題材はRGB→YCbCr変換。実はVivado HLSには画像のためのパッケージも入っていて、RGBとかYCbCrなどの型がすでに宣言されていますが、今回は使わずに全部自分で書いてみます。
ヘッダ。「Source」を右クリックして「rgb2ycbcr.h」というファイル名で追加。
#define dw 8

#include <ap_int.h>

struct RGB
{
    ap_uint<dw>	R,G,B;
};

struct YCbCr
{
    ap_uint<dw>	Y,Cb,Cr;
};

YCbCr rgb2ycbcr(RGB s);
「ap_uint<n>」が「nビットの符号無し整数」という型で、これがI/Oのデータ幅になります。SystemCの「sc_uint<>」とだいたい同じでしょう。「rgb2ycbcr」がハードウェアになる関数です。※これは後から気づいたことですが、dwはマクロじゃ無くてテンプレートで与えるべきでしょうね。
テストベンチ。「TestBench」を右クリックして「test01.cpp」というファイル名で追加。
#include <fstream>
#include <iostream>
#include <iomanip>
#include <cstdlib>
using namespace std;

#include "rgb2ycbcr.h"

#define dat    256        /*    pow(2, dw)    */

////////////////////////////
//
//    Y  = ( 0.2126R + 0.7152G + 0.0722B)
//    Cb = (-0.1146R - 0.3854G + 0.5000B) + 0.5
//    Cr = ( 0.5000R - 0.4542G - 0.0458B) + 0.5
//
YCbCr ref_rgb2ycbcr(RGB s)
{
    YCbCr    d;

    const float cY [3] = { 0.2126f,  0.7152f,  0.0722f };
    const float cCb[3] = {-0.1146f, -0.3854f,  0.5000f };
    const float cCr[3] = { 0.5000f, -0.4542f, -0.0458f };
    const float op5    = 0.5f * dat;
    const float llim   = 0.0f;
    const float ulim   = (float)(dat-1);

    float R,G,B;
    float Y,Cb,Cr;

    R = (float)s.R;
    G = (float)s.G;
    B = (float)s.B;

    Y  = cY [0] * R + cY [1] * G + cY [2] * B;
    Cb = cCb[0] * R + cCb[1] * G + cCb[2] * B + op5;
    Cr = cCr[0] * R + cCr[1] * G + cCr[2] * B + op5;

    if (Y  < llim) Y  = llim;    if (ulim < Y ) Y  = ulim;
    if (Cb < llim) Cb = llim;    if (ulim < Cb) Cb = ulim;
    if (Cb < llim) Cr = llim;    if (ulim < Cb) Cr = ulim;

    d.Y  = Y;
    d.Cb = Cb;
    d.Cr = Cr;

    return d;
}


////////////////////////////
//
//    R = Y                  + 1.5748(Cr-0.5)
//    G = Y - 0.1873(Cb-0.5) - 0.4681(Cr-0.5)
//    B = Y + 1.8556(Cb-0.5)
//
//    R = Y            + 1.5748Cr - 0.7874
//    G = Y - 0.1873Cb - 0.4681Cr + 0.3277
//    B = Y + 1.8556Cb            - 0.9278
//
RGB ref_ycbcr2rgb(YCbCr s)
{
    RGB d;

    const float cR[3] = { 0.0000f,  1.5748f, -0.7874f * dat };
    const float cG[3] = {-0.1873f, -0.4681f,  0.3277f * dat };
    const float cB[3] = { 1.8556f,  0.0000f, -0.9278f * dat };
    const float llim   = 0.0f;
    const float ulim   = (float)(dat-1);

    float R,G,B;
    float Y,Cb,Cr;

    Y  = (float)s.Y;
    Cb = (float)s.Cb;
    Cr = (float)s.Cr;

    R = Y              + cR[1] * Cr + cR[2];
    G = Y + cG[0] * Cb + cG[1] * Cr + cG[2];
    B = Y + cB[0] * Cb              + cB[2];

    if (R < llim) R = llim;    if (ulim < R) R = ulim;
    if (G < llim) G = llim;    if (ulim < G) G = ulim;
    if (B < llim) B = llim;    if (ulim < B) B = ulim;

    d.R = R;
    d.G = G;
    d.B = B;

    return d;
}

#define dpath "../../../../"
const char ifname[]= dpath "H-IIA-F13.bmp";
const char ofname[]= dpath "out.bmp";
const char ofnameRGB[]= dpath "outRGB.bmp";
const char ofnameY[]= dpath "outY.bmp";
const char ofnameCb[]= dpath "outCb.bmp";
const char ofnameCr[]= dpath "outCr.bmp";

#pragma pack(1)
struct BITMAPFILEHEADER {
    char            bfType[2];            //    "BM"
    unsigned int    bfSize;                //    File Size (Byte)
    unsigned short    bfReserved1;        //
    unsigned short    bfReserved2;        //
    unsigned int    bfOffBits;            //    Image Offset
};
#pragma pack(0)

#pragma pack(1)
struct BGR {
    unsigned char B,G,R;
};
#pragma pack(0)

int main()
{
    ifstream ifile;
    ofstream ofile;
    ofstream ofileRGB;
    ofstream ofileY;
    ofstream ofileCb;
    ofstream ofileCr;
    BITMAPFILEHEADER bf;
    int    imgsize;

    RGB        src;
    YCbCr    des;

    ifile.open(ifname, ios::binary);
    ofile.open(ofname, ios::binary);
    ofileRGB.open(ofnameRGB, ios::binary);
    ofileY.open(ofnameY, ios::binary);
    ofileCb.open(ofnameCb, ios::binary);
    ofileCr.open(ofnameCr, ios::binary);

    //    bf
    ifile.read((char*)&bf, sizeof(bf));

    cout << "bfType : " << bf.bfType[0] << bf.bfType[1] << endl;
    cout << "bfSize : " << bf.bfSize << endl;
    cout << "bfOffBits : " << bf.bfOffBits << endl;

    //    copy header
    ofile.write((char*)&bf, sizeof(bf));
    ofileRGB.write((char*)&bf, sizeof(bf));
    ofileY.write((char*)&bf, sizeof(bf));
    ofileCb.write((char*)&bf, sizeof(bf));
    ofileCr.write((char*)&bf, sizeof(bf));

    for (int i = sizeof(bf); i < bf.bfOffBits; i++)
    {
        char tch;
        ifile.read(&tch, sizeof(tch));
        ofile.write(&tch, sizeof(tch));
        ofileRGB.write(&tch, sizeof(tch));
        ofileY.write(&tch, sizeof(tch));
        ofileCb.write(&tch, sizeof(tch));
        ofileCr.write(&tch, sizeof(tch));
    }

    //    copy
    imgsize = bf.bfSize - bf.bfOffBits;

    for (int i = 0; i < imgsize; i+=3)
    {
        BGR ipx, opx;
        ifile.read((char*)&ipx, sizeof(ipx));
        src.R = ipx.R;
        src.G = ipx.G;
        src.B = ipx.B;
        des = ref_rgb2ycbcr(src);
//        des = rgb2ycbcr(src);
        opx.R = des.Y;
        opx.B = des.Y;
        opx.G = des.Y;
        ofileY.write((char*)&opx, sizeof(opx));
        opx.R = des.Cb;
        opx.B = des.Cb;
        opx.G = des.Cb;
        ofileCb.write((char*)&opx, sizeof(opx));
        opx.R = des.Cr;
        opx.B = des.Cr;
        opx.G = des.Cr;
        ofileCr.write((char*)&opx, sizeof(opx));
        opx.R = des.Cr;
        opx.B = des.Cb;
        opx.G = des.Y;
        ofile.write((char*)&opx, sizeof(opx));

        src = ref_ycbcr2rgb(des);
        opx.R = src.R;
        opx.G = src.G;
        opx.B = src.B;
        ofileRGB.write((char*)&opx, sizeof(opx));
    }

    ifile.close();
    ofile.close();
    ofileRGB.close();
    ofileY.close();
    ofileCb.close();
    ofileCr.close();
    cout << "done\n";
}
BMPファイルを読み込んで、変換して、BMPに保存します。実行パスが「.\rgb2ycbcr\solution1\csim\build\csim.exe」という深いところにできるので画像へのパスが長めに…(笑)
RGB→YCbCr変換はWikiに書いてある方法そのままです。ついでに画像を元に戻すYCbCr→RGBの逆変換関数も用意します。けど、なにも工夫してません。ちゃんと精度のこと考えてないので、正確でもありません。エラーチェックもろくしていない全くもっていい加減なプログラム。まぁだいたい見た目が似てればよいや、的な作りです。
後でmainでコメントアウトしているrgb2ycbcrとref_rgb2ycbcrを入れ替えてテストします。
とりあえずこのまま実行してみます。「Run C Simulation」をポチ。
デフォルトのまま実行開始。
こんな画像が出てきます。(※So-netブログはBMPダメ)。
左から、元画像、Y、Cb、Cr、BGR=CbYCrに置き換え、逆変換した画像
実行環境ができたので、ハードウェアになる対象の関数を記述していきます。
2013-04-24 17:33
nice!(0)
コメント(0)
トラックバック(0)


コメント 0